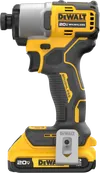
If you put your bench in public, you’ll want to anchor it to the ground to ensure it is stable and to prevent it from walking away. This guide will show you how to shield your bench’s feet, add mounting brackets, and anchor it to concrete (or soil).
Tools


The rotary hammer is only needed for anchoring in pavement.
Materials


Masonry anchors come in several forms, but screw anchors are the simpliest to use. Brands include Tapcon, CONFAST, and Simpson Titen HD. If you use a wedge or sleeve anchor, you will also need a hammer. Concrete needs 1.75” long anchors, while asphalt is less solid and needs longer 2.5” or 3” long anchors.
Long galvanized or stainless steel lag screws may be used for anchoring in soil. Altho they’re intended for wood-to-wood connections, here they can act as drillable stakes.
Mounting Brackets
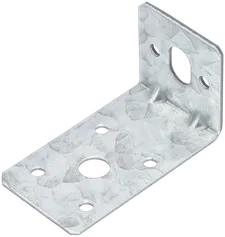
We use L-brackets as the connection between each wooden leg and the anchoring hardware. One side has small holes for the screws that attach to the bench, and the other side has a larger hole for the anchor.
If you want to shield the feet of your bench, do so before attaching the brackets.
For each bench foot, align the bracket with the template markings. Raise the bracket slightly off the ground to allow the anchor to pull the bench down.
<IMAGE HERE>
Attach the bracket to the bench foot using two connector screws. Drive the screws using the impact driver with 1/4” socket. Avoid holes near the wood edge to prevent splitting. Stop tightening once the screw is snug against the bracket and wood; do not over-tighten.
<IMAGE HERE>
Repeat for the other three feet.
Anchoring
Concrete Anchoring
First, position the bench where you want to install it. Ideally there should be at least 5 feet of clearance for the sidewalk. If at a bus stop, ensure there is adequate space around the bench for the ramp to deploy.
 |
|---|
| AC Transit’s Accessible Landing Zone and Rear Clear Zone diagram from page 18 of their 2018 Multimodal Corridor Guidelines (full image). |
Once positioned, hold the bench in place and use the rotary hammer to chip a small marking in the pavement where each anchor will go. Move the bench aside and drill the holes to the depth of the anchor plus 1/2” for dust (or as recommended by the anchor manufacturer). Then reposition the bench above the holes.
<IMAGE HERE>
For screw anchors, use your impact driver with 9/16” socket to drive each anchor thru the bracket and into the hole. Stop once the anchor is securely pressed down against the bracket; do not over-tighten.
<IMAGE HERE>
For wedge and sleeve anchors, with a nut shielding the top of the threads hammer the anchor thru the bracket and into the hole. Then tighten the nut to the recommended torque.
<IMAGE HERE>
Give the bench a good shake to ensure it is secure.
Soil Anchoring
Soil anchoring is simpler than concrete anchoring. First position the bench on firm, level ground. Then simply use your impact driver to drive each lag screw thru the bracket and into the ground. Stop once the bench feet are securely against the ground; do not over-tighten.
<IMAGE HERE>
Give the bench a good shake to ensure it is secure.