Qty
Item
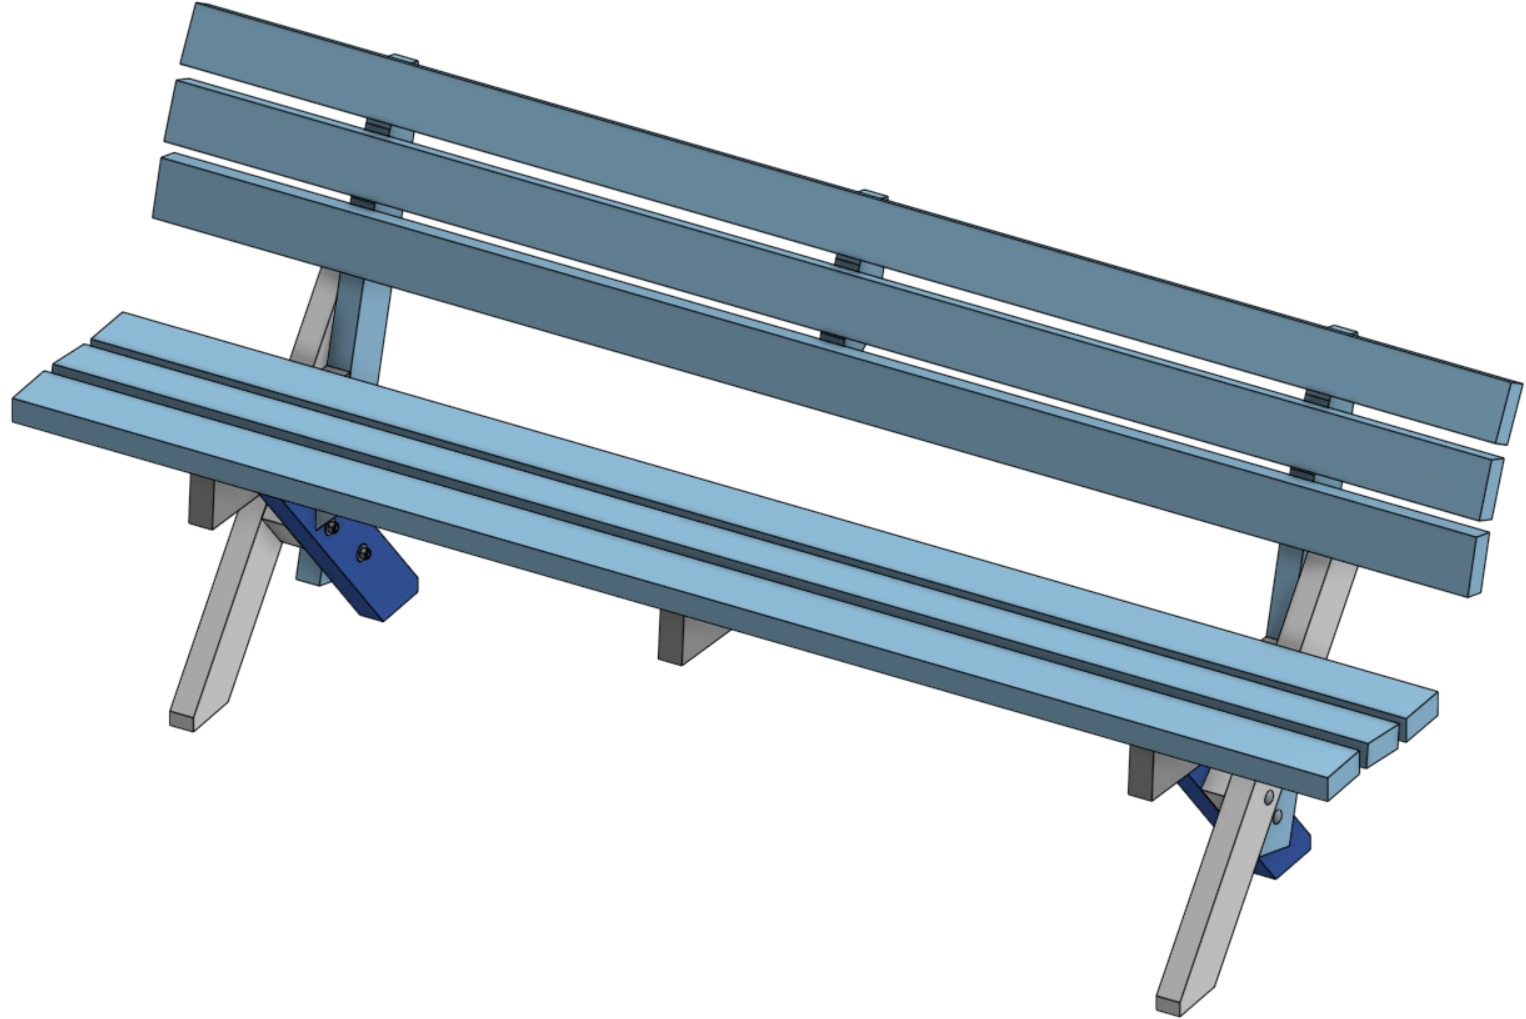
Welcome to the bench build guide! The design is a slightly-modified version of the Duderstadt Bench from the Public Bench Project in San Francisco. The Duderstadt Bench is perhaps the best, most functional bench design ever created. It is easy to build using cheap standard materials, very comfortable to sit on, lightweight & durable, and elegant. CAD plans for our design are on OnShape!
This guide is intended for people with minimal woodworking knowledge, and therefore includes a lot of detail. Read the guide before starting to get a sense of the process. This guide does NOT include woodworking safety information, so please review how to safely use tools and work with wood before building.
The first sections cover the tools and materials needed. The next sections cover the preparation and assembly of slats, leg frames, and braces—these sections may be done in any order.
Finishing the wood (stain or paint) is not covered by this guide, instead see the finishing guide. We recommend finishing after cutting and sanding but before assembly, though you can also finish after assembly.
(Note that nominal 2x4s are actually 1.5 in. by 3.5 in.)
 |
|---|
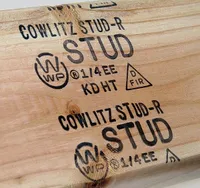
| A kiln-dried heat-treated Douglas fir 2x4 (“KD HT DFIR”) |
The 6 pieces are for the slats spanning the length of the bench. We can substitute 6x 8’ pieces for an 8’ bench, or 3x 8’ pieces cut in half for a 4’ bench.
For the slats, select straight or bowed pieces. Bow warping is OK as it can act as an arch to counter-act the weight of people sitting on the bench. Avoid twisted wood as it will prevent the bench from sitting flat. Select pieces with a smooth top side to avoid extra sanding and filling. Prefer kiln-dried heat-treated (“KD HT”) lumber over wet “green” lumber, as it is often smoother, less likely to warp, and easier to paint/stain.
For weather resistance, prefer Southern Yellow Pine (“SYP”), Douglas Fir (“D-FIR”), and Hemlock Fir (“HEM-FIR”), in that order, over generic whitewood (“SPF” spruce, pine, fir). Redwood and Cedar are even more decay resistant, but 3-4x the cost.
The pressure treated piece is for the feet; look for “ground contact” lumber.
One gallon of product typically covers 5-6 benches (7 ft. wide) with a single coat.
Sanding is necessary to remove splinters and rough edges.
Filling is optional. Most wood fillers are not waterproof (despite “exterior” marketing) and must be painted over. However epoxy (Bondo or JB-Weld) and CA glue (Starbond) based fillers are waterproof. Sander sawdust mixed with a waterproof wood glue (Titebond III) makes a somewhat water-resistant (tho hard-to-sand) wood filler.


Hardware is commonly available in a few different materials/coatings with varying weather resistance:
Connecting different types of bolts/nuts/washers together is not recommended due to galvanic corrosion.
The original Public Bench Project design uses 5/16 in. carriage bolts instead of 3/8 in. bolts. 3/8 in. hardware is stronger, and is standard for street furniture anchor bolts.
Screws should be exterior-coated construction/framing screws, or deck screws. There are a lot of brands but GRK, Grip-Rite, and SPAX are good options. Thicker #9 screws will also work, but overly-thick screws can cause wood to split if we don’t pre-drill pilot holes.
The “slats” are the 6 pieces that span the length of the bench. People will be sitting on them, so the slats especially should be smooth and free of splinters.
Sand the slats with the power sander using ~80 grit sandpaper. Ensure the top side and adjacent edges are smooth and free of splinters. Give the edges a small round-over (~1/8 to 3/8 in.) for comfort and to prevent splintering. (A router with a round-over bit is fastest, but a sander will work too).
Cavities may optionally be filled with wood filler, especially if the hole is large/sharp enough to pose a hazard to small fingers or clothing, then sanded when cured.
 |
|---|
| Hole positions on the template. |
| Bench length | Hole dist (2 legs) | Hole dist (3 legs) |
|---|---|---|
| 4-5 ft. | 6 in. | x |
| 6 ft. | 12 in. | x |
| 7 ft. | 12 in.* | 6 in. |
| 8 ft. | 18 in.* | 12 in. |
| 10 ft. | x | 12 in. |
| 12 ft. | x | 12 in.* |
We will need to drill pilot holes for the screws that will hold the slats to the leg frames. The leg frames need to be properly spaced to support the entire length of the bench; we should avoid any spans between slats greater than 5 ft. to prevent sagging.
The template has small pairs of holes which are 6, 12, and 18 in. from the end. The table to the right shows the recommended distance for each bench length. “Hole dist” is the distance from the end of the slat to the outer pilot holes. Options marked with an asterisk (*) require brace pieces in the middle of each span to prevent sagging. Brace pieces and third leg frames should be spaced evenly between the two outer frames.
Align the square end of the template with the end of the slat and find the correct pair of holes. Keep the drill vertical and use the small (3/32 to 1/8 in.) bit to drill each pilot hole. Each slat needs a pair of holes for each leg frame and brace piece, so for example 4-6 ft. benches need four holes, while 7-8 ft. benches need six holes.
<TODO: IRL pic here>
At this point the slats are complete. We recommend applying the finish now (though you can also wait until after assembly)— see the finishing guide.
 |
|---|
| Leg frame side view with labels. |
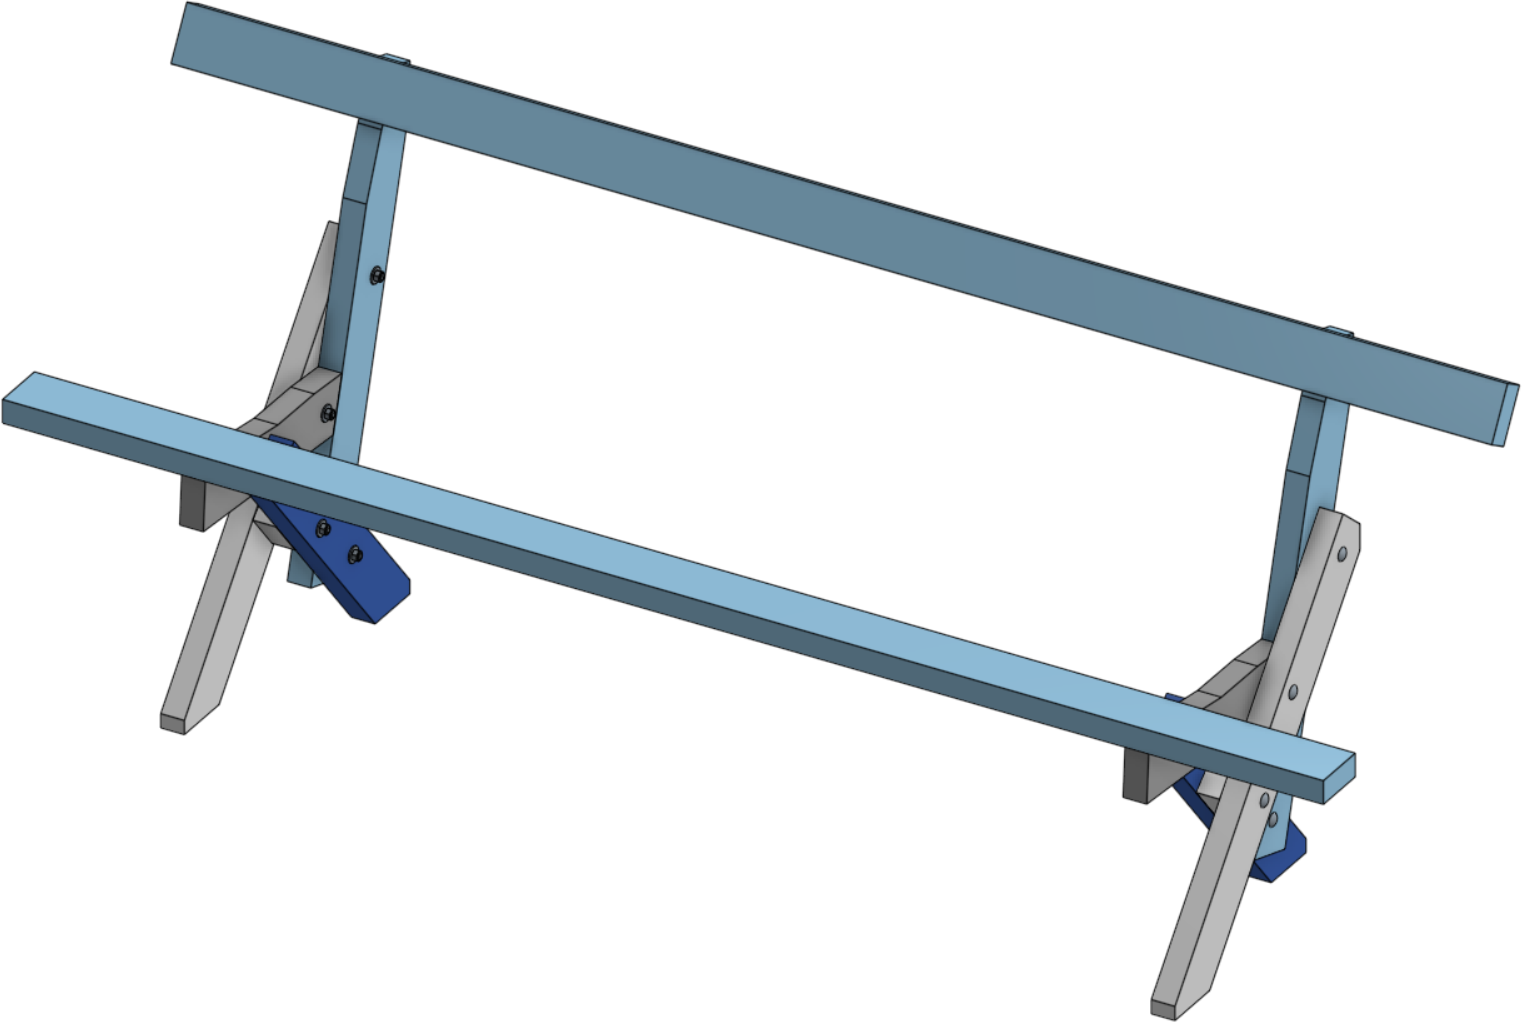
Each bench has two leg frames at each end of the bench (and possibly more in the middle) to support the seat and backrest slats.
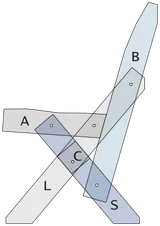
Each leg frame has two legs: a long forwards leg (L), and a short backwards leg (S),
as well as a seat rest (A), a backrest (B), and a center spacer (C) positioned between L and S.
Trace two short S legs and two long L legs from the template onto our pressure-treated 2x4x8.
The angled foot cut of adjacent legs should touch, as shown, to ensure all pieces fit.
Each leg pieces uses three of the four template holes: the long leg uses the three holes closest to the top, and the short leg uses the three holes closest to the bottom.
| Four legs cut from a single 2x4x8. |
Trace two A seat rests, two B backrests, and two C center spacers from the template onto our other 2x4x8.
The angled back sides of the A pieces should touch, as shown, to ensure all pieces fit.
On the template, the A pieces use the two innermost holes, while the B pieces use the two outermost holes.
| Seat rests, backrests, and spacers cut from a single 2x4x8. |
Once all pieces are traced, use the 3/8 in. drill bit to drill out all the holes as marked.
A DrillBlock will help keep the holes aligned and vertical.
The S spacer pieces are especially small and difficult to drill after cutting, so make sure to drill the holes first.
Use the jigsaw and/or circular saw to cut out all the pieces as traced.
Make sure to use the tools safely— clamp the wood to a stable surface while cutting.
The seat dent of the A piece is particularly tricky to cut;
we may want to start one side of the cut with the circular saw and finish the other side with the jigsaw, or just use the jigsaw and go slowly.
At this point we should sand the sharp-cut edges of our pieces.
In particular, the front of the A piece, top/back of the B piece, and the top/back of the L piece are all places people may touch.
We recommend applying the finish now (though you can also wait until after assembly)— see the finishing guide. We can also seal the end cuts of the leg pieces— see the end cuts guide.
Each leg frame is assembled from the pieces we cut earlier and connected using the 3/8 in. carriage bolts. We will need one long 5 in. carriage bolt and four short 3-1/2 in. carriage bolts for each leg frame.
The pieces can be assembled in pretty much any order, but starting with the leg pieces may be the least confusing:
Tap the long (5 in.) carriage bolt fully thru the lowest hole in the L long leg.

Continue tapping the long bolt thru the C spacer piece, supporting it on both sides to prevent splitting, then thru the middle hole of the S short leg.
Tap a short (3-1/2 in.) carriage bolt thru the middle hole of the A seat rest, then thru the top hole of the S short leg. Tap a second short bolt partially thru the middle hole of the L long leg.
Use the protrusion of the second bolt to align it with the second hole of the A seat rest, then tap the bolt fully thru.
Tap a short bolt thru the bottom hole of the B backrest, then thru the bottom hole of the S short leg. Tap a second short bolt partially thru the top hole of the L long leg.
Push the B backrest agains the A seat rest and visually confirm that the top L hole and top B hole are aligned. Tap a short bolt thru both.
The last holes may be a bit misaligned, but wood is flexible and can usually bend to accomodate. If we cannot force the pieces into alignment, we can try loosining the other bolts to allow for more play.
 |
|---|
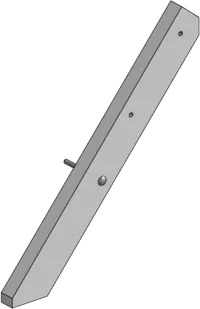
| Properly seated carriage bolt. |
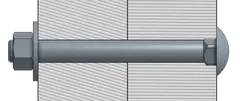
Once all bolts are in place, add a washer and nut to the opposite side of each bolt. Use the impact driver with the 9/16 in. nut driver/hex socket to tighten the nuts. Do not overtighten—watch both the washer and the carriage bolt (on the other side). See the diagram to the right: the washer, and the mushroom head of the carriage bolt should be flat against the wood, while the square neck of the carriage bolt should be fully seated in the wood. Only a few threads should be visible above the nut.
Once the first leg frame is complete, repeat for the second leg frame but mirrored.
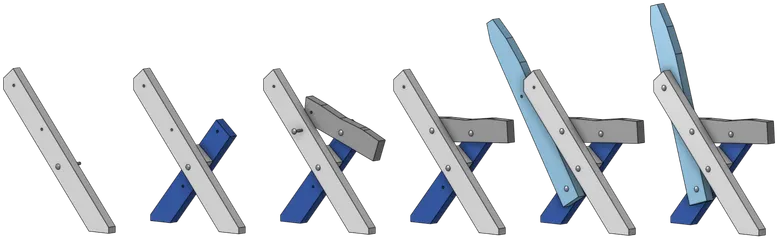 |
|---|
| Mirrored leg frame assembly steps. |
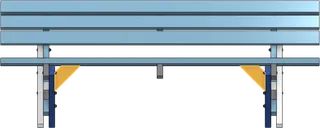
Brace pieces connect slats together, sharing the load to preventing inividual slats from sagging or breaking. If slats span more than ~4 ft. between leg frames, we should add braces in the middle.
TODO
 |
|---|
| Spacer positioning. |
This is where it all comes together! This sections describes how to assemble a bench alone with two bar clamps, but if we have friends to help we may not need the clamps.
We need two 3/4 in. spacers for positioning the slats. To make them, cut a 3/4 in. square dowel into short pieces 2-3 in. long. The spacers will be used horizontally except between the second and third seat slats, due to the concavity of the seat.

On a flat floor, stand up the leg frames in their appoximate final positions. We can use the clamps horizontally to stabilize the feet.
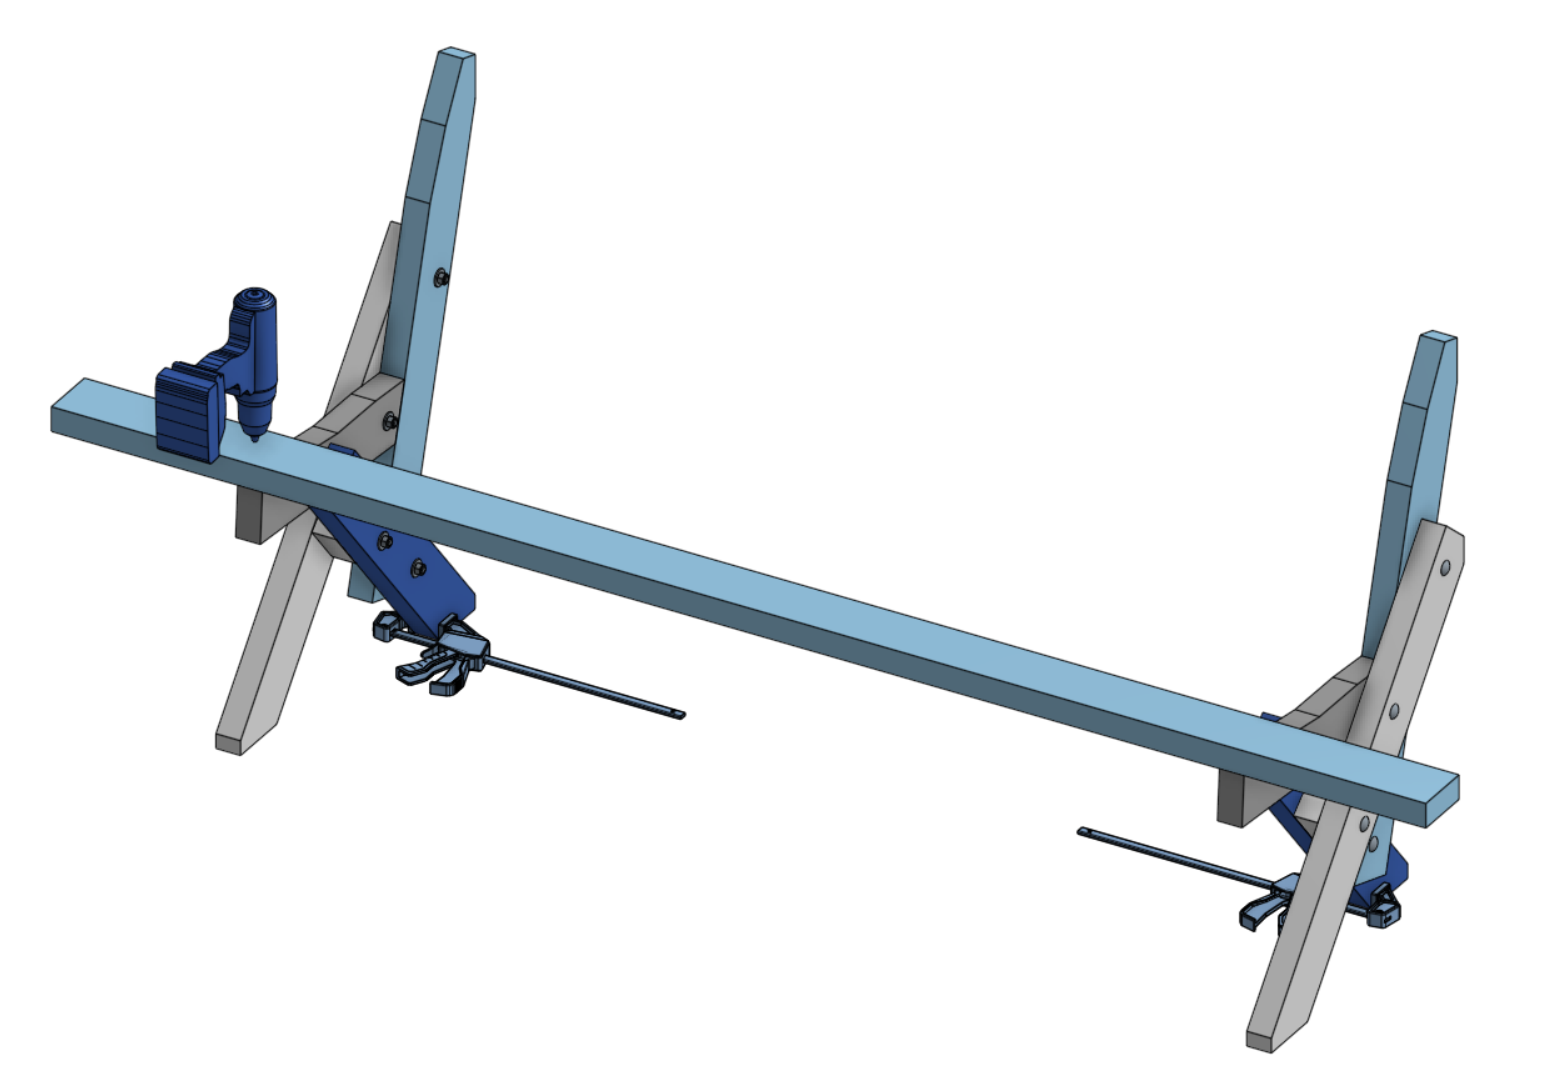
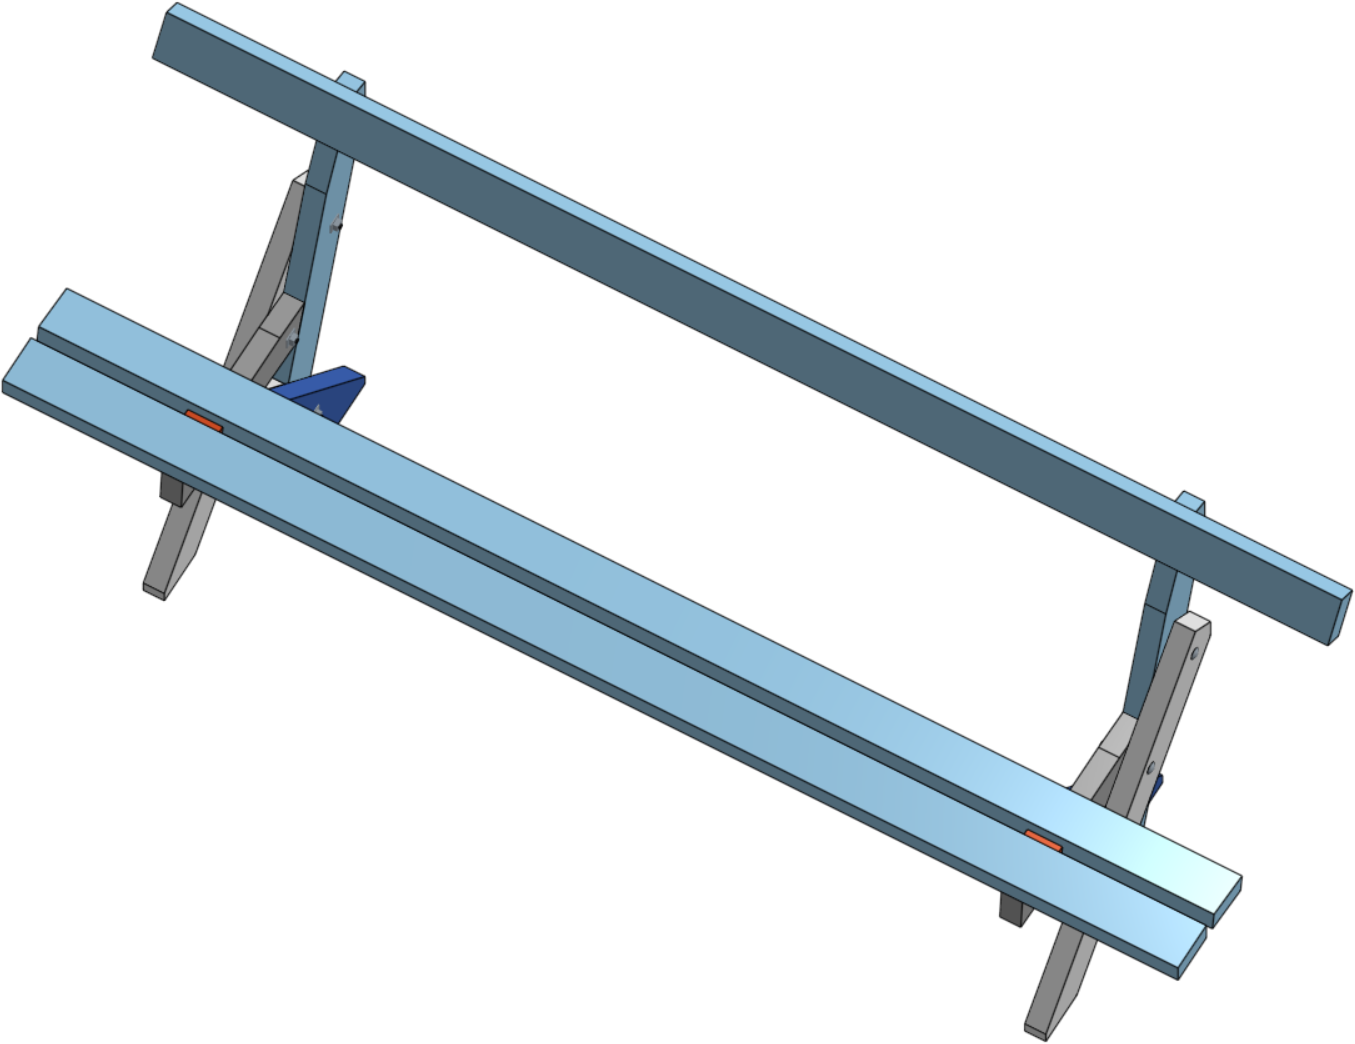
Find a straight, flat slat and lay it across the leg frame seat pieces. It should overhang the front by ~1/4 inch. Align the pilot holes with the slats below, and drive in one screw on each side.
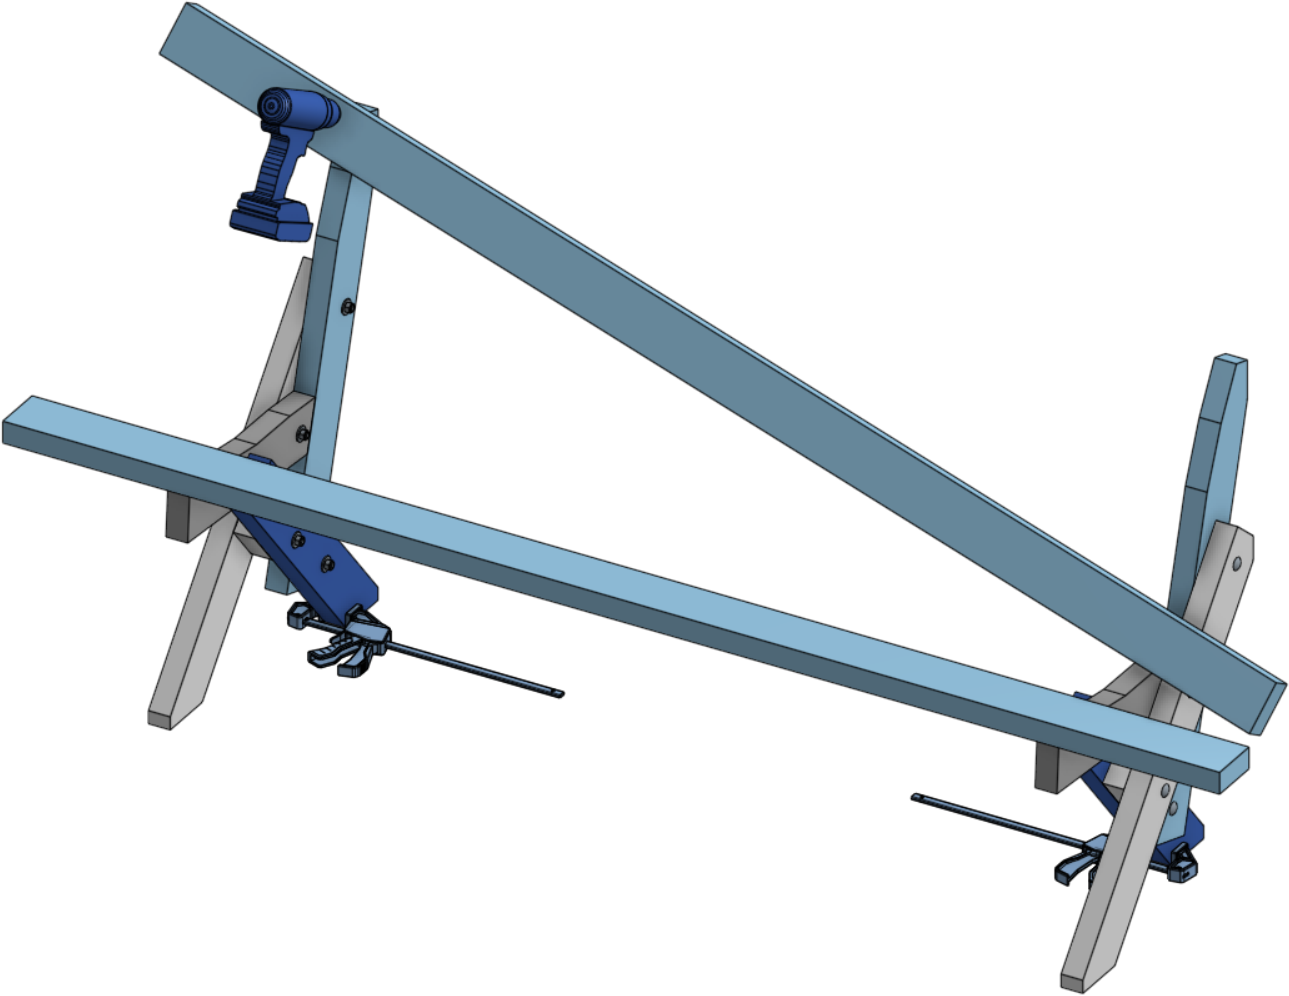
Find a straight, flat slat and partially drive a screw thru the top pilot hole on one side. Align the screw with the frame backrest such that the slat will slightly overhang the top, then drive the screw fully into the frame.
Carefully lift the other side of the slat up to the other frame’s backrest and drive in a screw. Though unsteady, the bench can now stand on its own. Square all the angles between the slats and frames.
Place a second seat slat next to the first, with spacers between them. Sit to use our weight to keep the slat from lifting while driving-in one screw on each side.
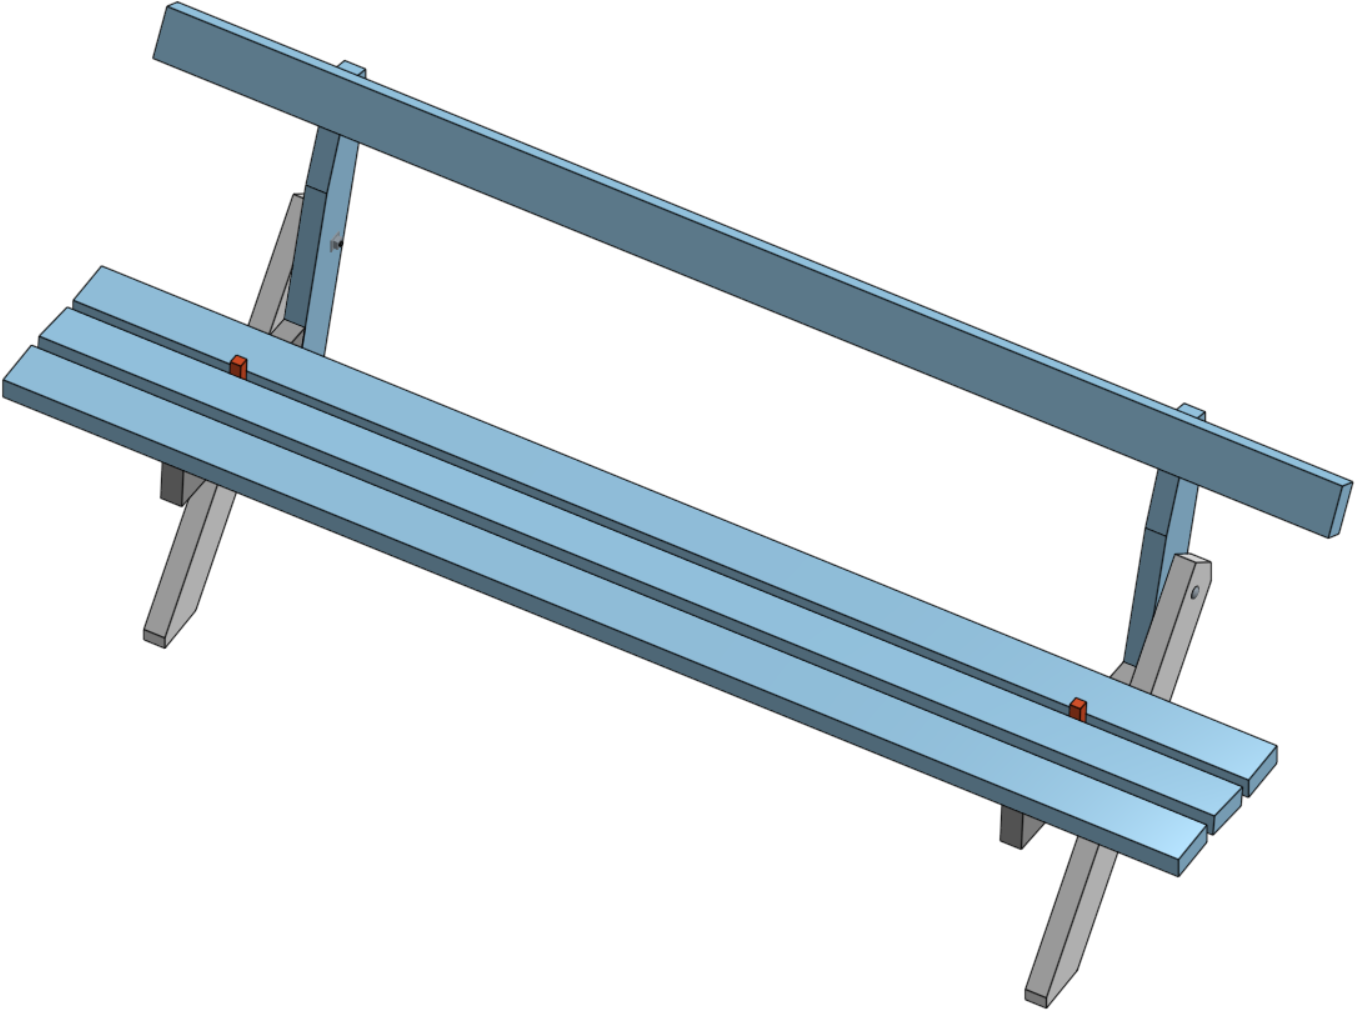
Place the third seat slat next to the second, with spacers between them. The spacers should be vertical this time, due to the concavity of the seat. Drive one screw in on each side.
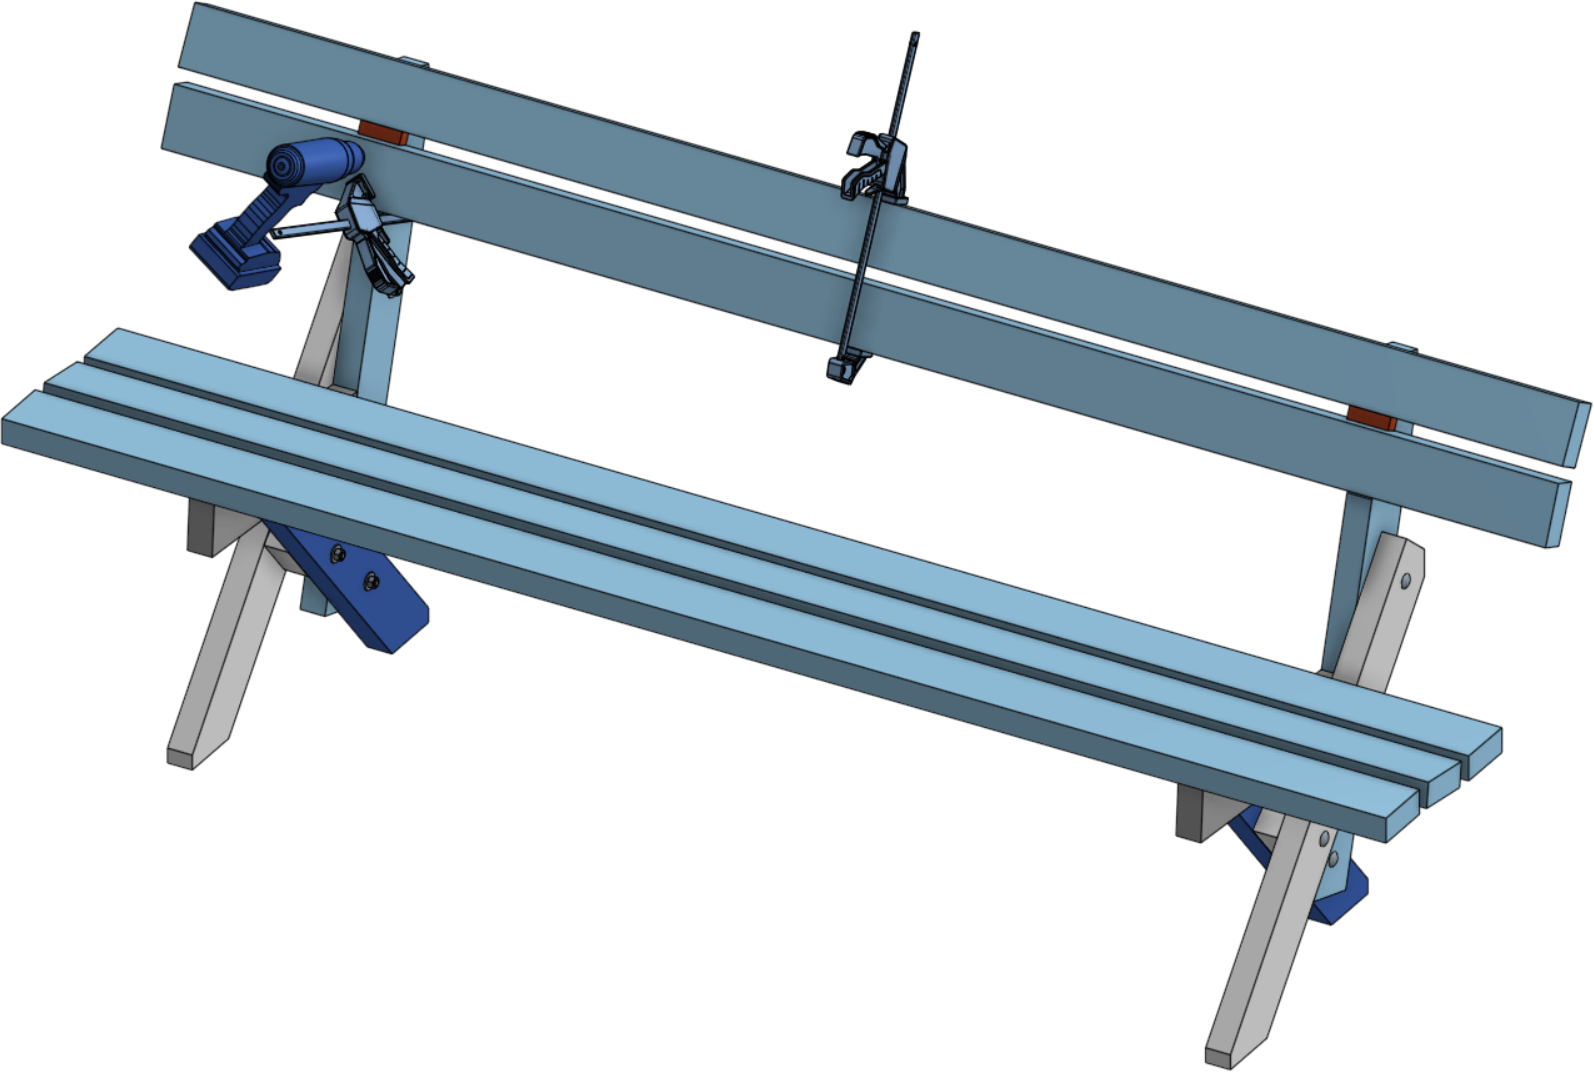
Use a bar clamp to lift a second backrest slat below the first. Place spacers between the slats, and then use the second clamp to hold the slat tight while driving in one screw on each side.
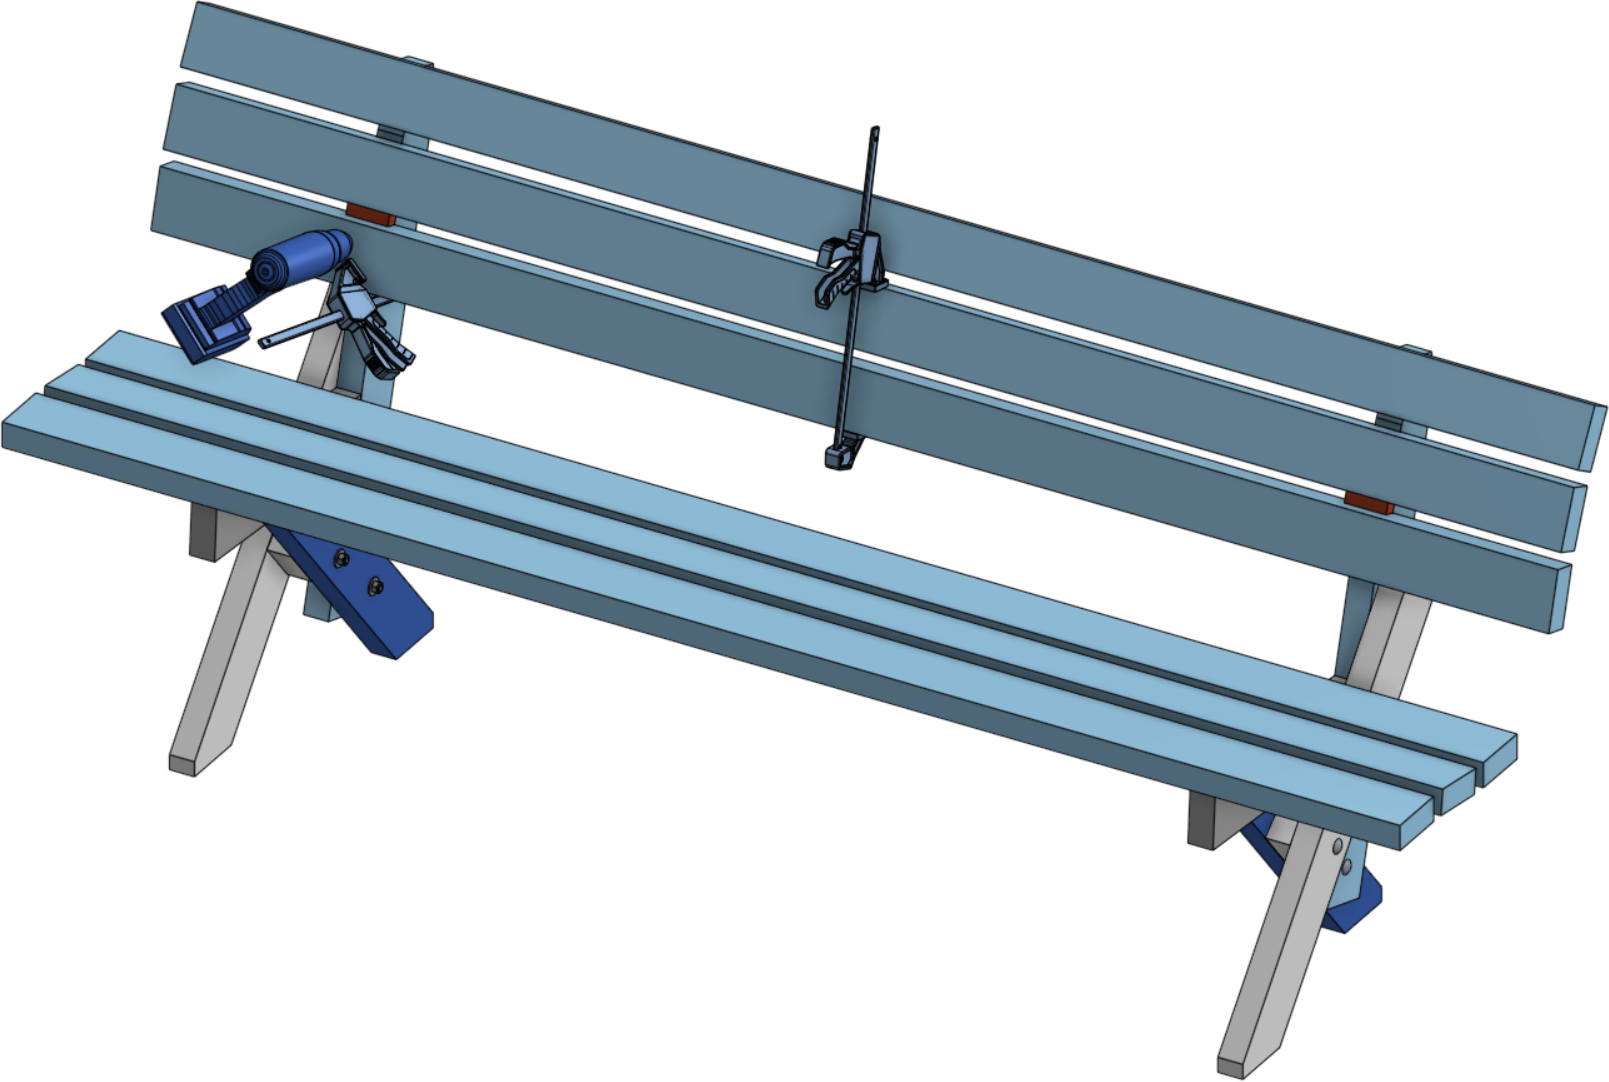
Repeat as before for the third backrest slat, using spacers and clamps to hold it in place while driving in screws. Re-square the bench and now drive in all of the second screws we skipped.
If the span between legs of the bench is more than ~4 ft., we should add either center braces to tie the slats together, or another leg to support the slats.
TODO: CENTER BRACES
 |
|---|
| Diagonal braces highlighted in yellow. |
The bench is almost done, but is still vulnerable to shear forces from the side. Diagonal braces that connect the leg frames to the slats will stiffin things up.
TODO: REST OF THE Steps